[ad_1]
The Google Photos Locked Folder feature has finally arrived and Jack Wallen wants to show you how to use it.
Image: Angela Lang/CNET
It’s funny how Google will announce a new feature in an upcoming rollout, only to then hold that feature back, even after the rollout has happened. One such feature is the long overdue Locked Folder feature in Google Photos. This new feature was announced at Google I/O 2021 and then set for the June feature drop. The feature drop happened, but the Locked Folder option wasn’t available. It took nearly two weeks for the feature to finally make it to my Google Pixel 5. Lo and behold, the feature is now on my Android device and it’s everything I’d hoped it would be.
You want this feature and you will use this feature. I immediately enabled it and started placing images like signed documents into the locked folder. I frequently use those documents for clients, but have always uploaded them, used them and deleted them. Now, I can lock them behind an encrypted folder and not worry they’ll be viewed by nefarious eyes.
How do you make use of this feature? I’m going to show you how to do just that.
SEE: Security incident response policy (TechRepublic Premium)
What you’ll need
To use the Google Photos Locked Folder feature, you’ll need a Pixel device. Hopefully, this feature will be made available to all Android devices, when 12 is finally released. In the meantime, a Pixel phone is required.
How to enable Locked Folder
Open Google Photos on your Pixel device. From the main window, you’ll see the Utilities button (Figure A).
Figure A

The Utilities button will get you to the Locked Folder feature.
In the resulting window, you’ll see the Set up Locked Folder card (Figure B).
Figure B
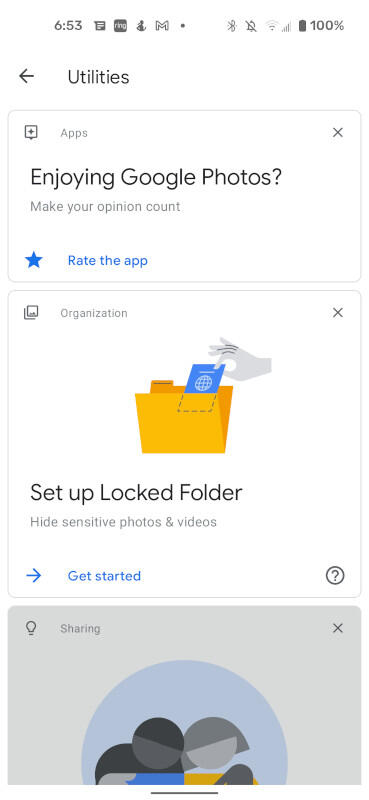
The Locked Folder feature has finally arrived.
Click Get Started and then (in the next screen) tap Setup Locked Folder. You will then be required to authenticate with your fingerprint/face scan or PIN.
When prompted, tap Move Items and you will find yourself in Google Photos, with a list of all your photos (Figure C).
Figure C
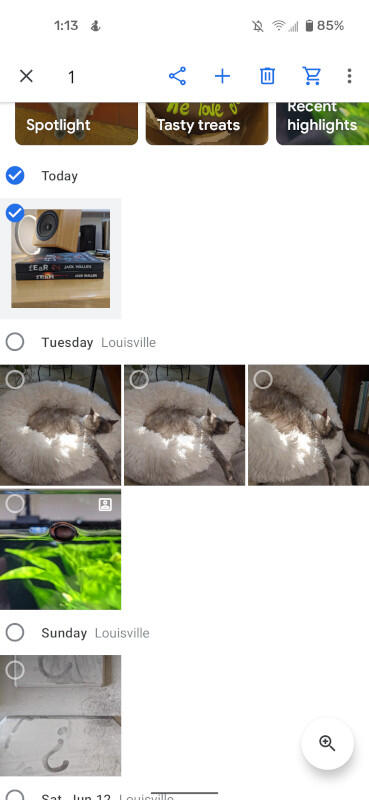
My photos in the Google Photos app, ready to be added to the Locked Folder.
You must scroll through your folders and select the images you want to send to the Locked Folder. After you’ve selected all of the folders you want to tuck inside the Locked Folder, tap Move in the upper-right corner. You will again be prompted to authenticate and then tap Move again. Once you’ve done that, all of the images will now be locked behind that folder and will not be available through the cloud-based Google Photos or on any of your synced devices.
How to view locked images
To view the images you’ve placed in the Locked Folder, go back to the Google Photos app main page and tap Utilities. Scroll down and tap the Locked Folder entry (Figure D).
Figure D

The Locked Folder entry in the Utilities section of Google Photos.
You will be prompted to authenticate with your fingerprint/face scan or PIN. Once successfully authenticated, the images you’ve placed in the folder will be available to view. You can also move any images out of the Locked Folder by long-pressing the image and then tapping Move (which will move the image out of the Locked Folder and into its original place).
And that’s all there is to using the Google Photos Locked Folder feature. This long-overdue addition should please anyone who’s needed to keep sensitive information from prying eyes.
Subscribe to TechRepublic’s How To Make Tech Work on YouTube for all the latest tech advice for business pros from Jack Wallen.

Also see
[ad_2]
Source link