[ad_1]
When you need to delete records based on a single value in Microsoft Excel, use this Visual Basic procedure. It can make your life a lot easier.
Image: Imam Fathoni, Getty Images/iStockPhoto
The article How to use VBA to insert multiple columns in an Excel sheet reviews a VBA procedure that inserts multiple columns (and rows). It’s super easy and this VBA procedure in this article is similar, but more complex. In this article, we’ll review a VBA procedure that deletes rows in a selected range where a value in that range matches an input value supplied by you. The number of lines in the procedure looks a tad overwhelming, but it contains several comment lines for documentation purposes.
SEE: 83 Excel tips every user should master (TechRepublic)
I’m using Microsoft 365 on a Windows 10 64-bit system, but you can use earlier versions. Use the downloadable .xlsm, .xls or .cls files to obtain the code. Excel Online doesn’t support macros. This article assumes that you have basic Excel skills; however, even a beginner should be able to follow the instructions to success.
About the VBA procedure
You can modify the procedure in Listing A a bit, but as is, it isn’t particularly flexible about its task. You must select a single-column range before running the procedure. The first few lines declare and define a few variables, check that the range selected beforehand is more than one cell and isn’t more than one column. When the selection passes those checks, the code prompts you to enter the string you want to match to values in the selected range. There’s no data type error handling for this statement; it accepts any input and treats it as a String data type. The for-loop then cycles through the selected range checking for the input value. When the value and the input value match, the code deletes the entire row. If there are no matching values, the final If statement returns an information message (which will happen when your input value doesn’t match any value in the selected ranged).
Listing A
Sub DeleteRows()
‘Delete rows by selecting the range and entering the criteria.
‘Range should be a single column. How to capture and enforce?
Dim i As Integer
Dim j As Integer
Dim selRange As Range
Dim crit As String ‘Use Integer or Variable if not String.
Set selRange = Selection
‘Catches one-cell selection
If selRange.Rows.Count = 1 Then
MsgBox “You’ve selected only one cell. ” _
& “Please select multiple contiguous rows ” _
& “within a single column.”, vbOKOnly
Exit Sub
End If
‘Catches multiple-column selection
If selRange.Columns.Count > 1 Then
MsgBox “You’ve selected multiple columns. ” _
& “Please select a single-column range.”, _
vbOKOnly
Exit Sub
End If
‘All input will be treated as a string, regardless of intent.
crit = InputBox(“Please enter the criteria as a string.”, _
“Delete by criteria.”)
‘Cycle through rows in selRange and delete entire row when crit
‘equals the current value.
j = 0
For i = selRange.Rows.Count To 1 Step -1
If crit = selRange.Cells(i, 1).Value Then
selRange.Cells(i, 1).EntireRow.Delete
j = j + 1
End If
Next i
‘MsgBox “You deleted ” & j & ” rows.”, vbOKOnly
‘Returns a message that no rows were deleted because there isn’t a ‘match.
If j = 0 Then
MsgBox “Please try again and check your input value carefully. ” _
& “The procedure didn’t delete any rows because it didn’t find ” _
& “any values that match ” & crit & “.”, _
vbOKOnly
End If
End Sub
If you’re using a ribbon version, be sure to save the workbook as a macro-enabled file or the procedure won’t run. If you’re using a menu version, you can skip this step.
To enter the procedure, press Alt + F11 to open the Visual Basic Editor (VBE). In the Project Explorer to the left, select ThisWorkbook so you can run the procedure in any sheet. You can enter the code manually or import the downloadable .cls file. In addition, the macro is in the downloadable .xlsx and .xls files. If you enter the code manually, don’t paste from this web page. Instead, copy the code into a text editor and then paste that code into the ThisWorkbook module. Doing so will remove any phantom web characters that might otherwise cause errors.
How to use the VBA procedure
Once you’ve added the procedure to your Excel workbook file via the VBE, you can execute it against any data range on any sheet in your workbook. Let’s use it to delete all of the beverage records (column E) in the simple data set shown in Figure A. First, select the data range that you’re deleting rows from; in our case that’s E3:E47 in the demonstration workbook. Then, continue as follows:
- Click the Developers tab.
- Click Macros in the Code group.
- In the resulting dialog, choose DeleteRows(), shown in Figure B and click Run. (The demonstration file contains other procedures from the article cited in the introduction.)
- When prompted, enter Beverages, as shown in Figure C, and click OK.
Figure A
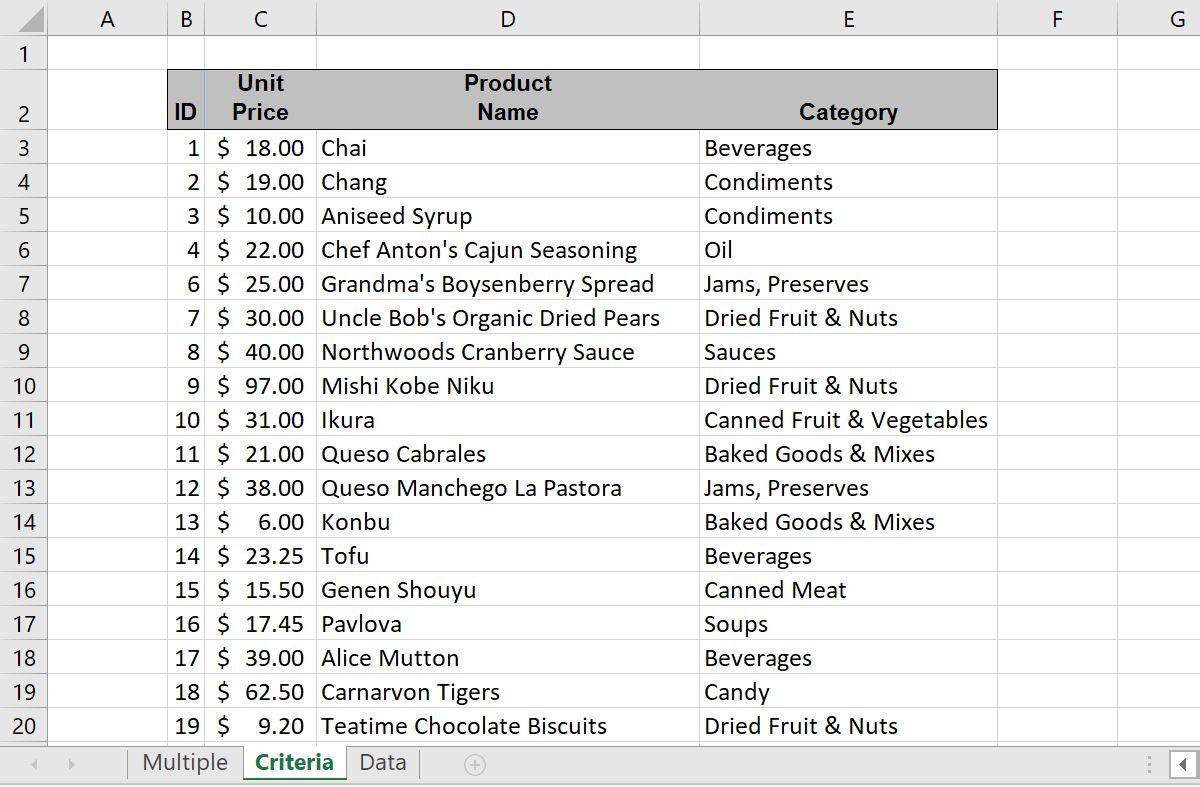
We’ll use VBA to delete matching values from any column in the sheet.
Figure B
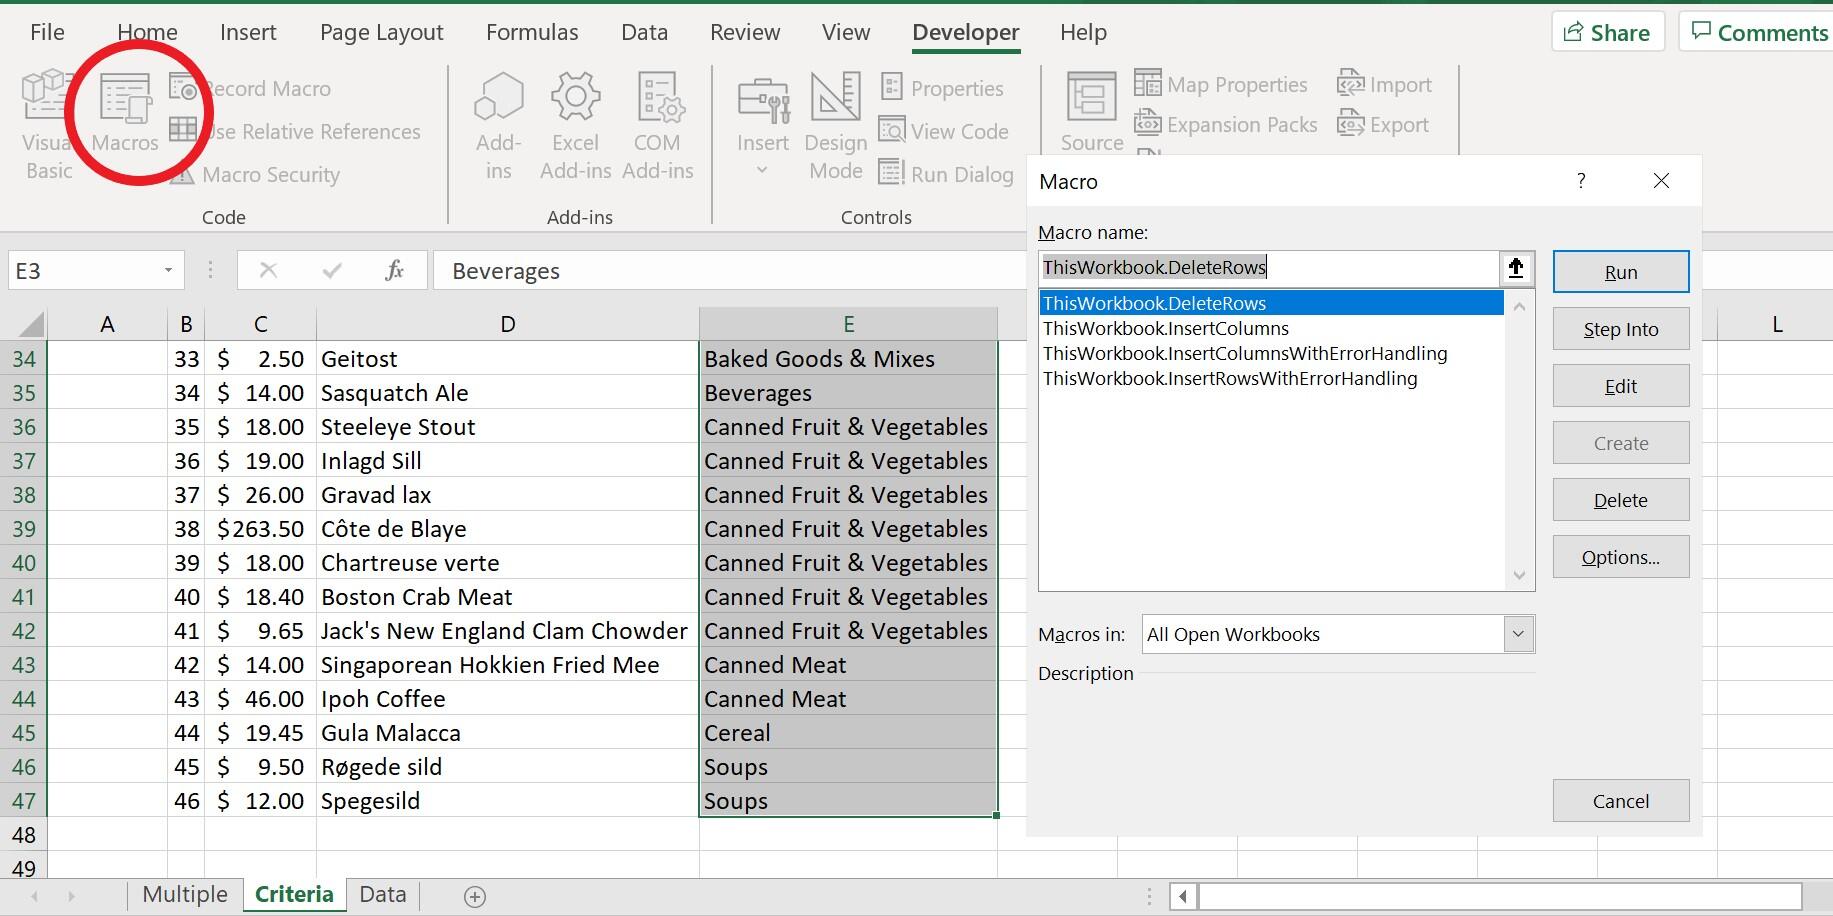
Choose the VBA procedure DeleteRows().
Figure C

Enter the Category value Beverages.
That’s it! As you can see in Figure D, the beverage records (rows) are gone. In fact, the first record is gone and it was a beverage record. To find more deleted rows, check the ID column to the left. It was a list of consecutive values. Finding the missing values is easy, and those missing values represent delete beverage records.
Figure D
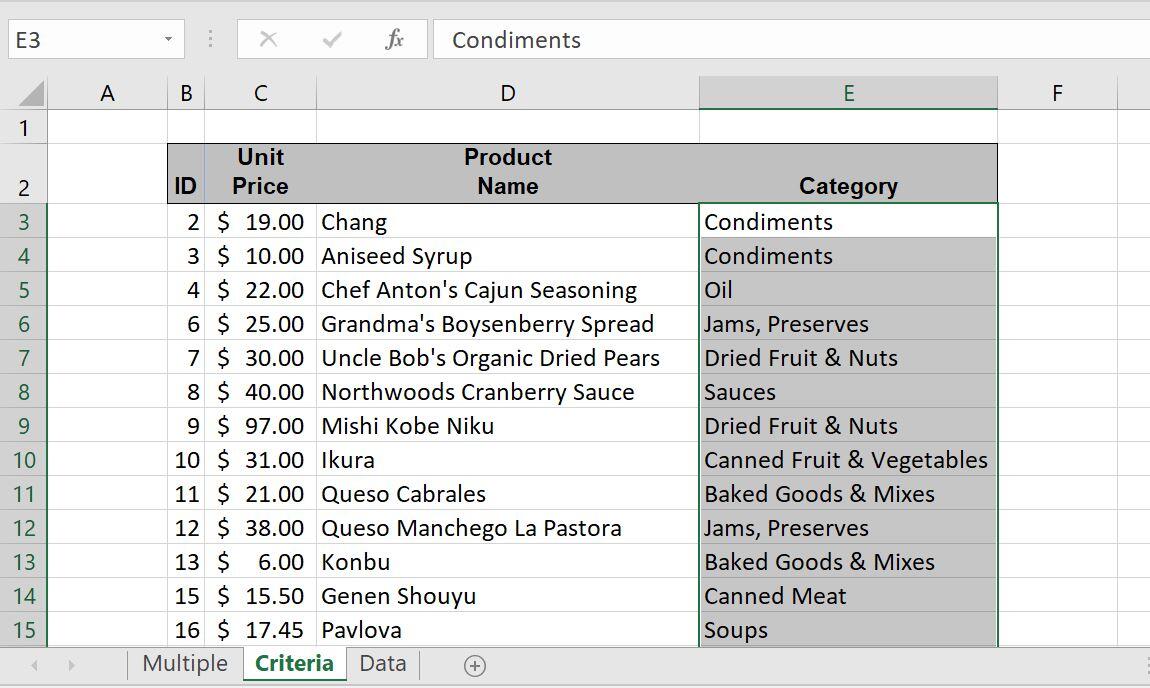
The procedure removed the matching records.
In a nutshell, you selected the category values in the simple data set. The macro then prompted you for a category value to match, and you entered Beverages. When the For-loop found a match, it deleted the entire record. The end result is that your data set no longer contains any beverage records.
Things to consider
There might be values stored off screen that you can’t see. This procedure deletes the entire row, which includes data you don’t see. Make sure there’s no data to the left or right of the selected column that you don’t want deleted before you execute this macro. You can’t undo the delete using Alt + Z. If there’s any question, always save the workbook just before deleting data. That way you can revert if necessary. In a future article, I’ll show you how to use the InputBox() statement to prompt users to select a range; that way they don’t have to remember to select the range before executing the procedure.
Some category entries are a bit wordy, which increases the opportunity for typos when you enter a category when prompted. You can copy the value to the Clipboard beforehand and then paste that value in the input box when prompted. You could offer a list of category values to avoid this possibility but doing so is beyond the scope of this simple procedure.
SEE: Windows 10: Lists of vocal commands for speech recognition and dictation (free PDF) (TechRepublic)
If you enter a typo or a category value that doesn’t exist, don’t worry. The For-loop tracks deleted rows with the J counter. If that count equals zero, the procedure will display an information message that lets you know it deleted no rows and (probably) why. If you want to display the number of rows deleted, regardless, you can do so by adding a message box statement. The demonstration file already has this statement, but it’s commented out. Simply remove the comment character (‘).
It might not be obvious, but the procedure allows you to delete values from any column in any sheet, so in that respect, it is versatile. Select any single column of data and enter the value you want to match. We worked with the Category column to set the criteria, but you can use the procedure with any column.
If you want to work with more delete examples, the sheet named Data in the demonstration file contains the data set in its entirety. Because you can’t undo the procedure’s delete, you can copy and paste the entire data set to run each example.
It’s unlikely that you’ll want to work through all those steps every time you want to run the procedure. Instead, add the macro to the Quick Access Toolbar. To do so, read How to add Office macros to the QAT toolbar for quick access.

Also see
[ad_2]
Source link